继docker国内镜像不能用之后,我这边的80 443端口也被封了,不能像以前一样偷懒用npm一键申请ssl证书了,只能手动配置一下官方nginx+certbot,在非标端口申请并配置ssl
已经成功了,等我整理一下,再写出来
由于众所不周知的原因,国内镜像源也没了,可能有些还能用,最差的情况就是全部都不行了,故到时候需要自建docker镜像,这样只需保持一台机器和官方仓库的连通性即可
docker运行nginx并用非标端口申请ssl证书
目录
[TOC]
0.前置条件
安装好docker,docker-compose
1.docker安装nginx
1.1 创建目录
mkdir -p /home/nginx/etc/nginx/conf.d /home/nginx/usr/share/nginx/html /home/nginx/certs /home/nginx/config /home/nginx/config/do.not.even.try1.2 创建并编辑nginx.conf
vim /home/nginx/etc/nginx/nginx.conf粘贴如下配置文件进去(如果你不想用这个的话,也可以等后面容器起来以后,再把默认的配置文件复制出来)
user  nginx;
worker_processes  auto;

error_log  /var/log/nginx/error.log notice;
pid        /var/run/nginx.pid;


events {
    worker_connections  1024;
}


http {
    server_tokens off; # 隐藏版本号
    include       /etc/nginx/mime.types;
    default_type  application/octet-stream;

    log_format geoip_enriched '[$time_iso8601] $remote_user 远程地址:$remote_addr | 类型:$scheme | 请求:$request | '
                            '状态码: $status | 发送字节数: $body_bytes_sent | 引荐来源: $http_referer | '
                            'UA: "$http_user_agent" | 代理转发IP: $http_x_forwarded_for | '
                            '国家: $geoip_country | 州/省: $geoip_stateprov | 城市: $geoip_city | '
                            '纬度: $geoip_latitude | 经度: $geoip_longitude | 大洲: $geoip_continent | '
                            '时区: $geoip_timezone | ASN: $geoip_asn | ASN组织: $geoip_asnorganization';

    access_log  /var/log/nginx/access.log  geoip_enriched;


    sendfile        on;
    #tcp_nopush     on;

    client_max_body_size 8G;
    server_names_hash_bucket_size 64;

    keepalive_timeout  65;

    gzip  on;

    include /etc/nginx/conf.d/*.conf;
}:wq保存退出
1.3 创建并编辑nginx的docker-compose.yml
vim /home/nginx/docker-compose.yml粘贴进去(2个模式二选一):
- host模式:(推荐)
其中host模式需要用到的端口由文件夹/home/nginx/etc/nginx/conf.d/中的conf配置文件中listen的端口决定
version: '3' #新版已经弃用version
services:
  nginx:
    image: nginx:latest
    container_name: nginx
    network_mode: host
    volumes:
      - ./usr/share/nginx/html:/usr/share/nginx/html
      - ./etc/nginx/nginx.conf:/etc/nginx/nginx.conf
      - ./etc/nginx/conf.d:/etc/nginx/conf.d
      - ./var/log/nginx:/var/log/nginx
      - /home:/home
    restart: always
    environment:
      - TZ=Asia/Shanghai
  geoip:
    image: observabilitystack/geoip-api:latest
    ports:
      - 172.17.0.1:8081:8080
restart: always- bridge模式:
#version: '3' #新版已经弃用version,如果报错可以取消注释此行
services:
  nginx:
    image: nginx:latest
    container_name: nginx
    ports:
      # 端口如果旧版的docker-compose报错就改成第一种,推荐第二种
      # - "8880:8880"
      # - "8443:8443"
      - target: 8880
        published: 8880
        mode: host
      - target: 8443
        published: 8443
        mode: host
    volumes:
      - ./usr/share/nginx/html:/usr/share/nginx/html
      - ./etc/nginx/nginx.conf:/etc/nginx/nginx.conf
      - ./etc/nginx/conf.d:/etc/nginx/conf.d
      - ./var/log/nginx:/var/log/nginx
      - /home:/home
    restart: always
    environment:
      - TZ=Asia/Shanghai
  geoip:
    image: observabilitystack/geoip-api:latest
    ports:
      - 172.17.0.1:8081:8080
    restart: always
本文使用的是非标端口,如果你要用80 443的话,可以把全文中的8443替换为443,把8880替换为80
2.杂项
本文通过certbot获取ssl证书,安装certbot推荐使用snap安装,用apt容易拉到旧版的
并且这里采用的是cloudflare的dns验证,所以需要你有cf的api
2.1 安装snapd
apt install snapd
sudo systemctl enable snapd
sudo systemctl start snapd
2.2 安装certbot
sudo snap install --classic certbot非ubuntu可能需要添加环境变量
echo 'export PATH="$PATH:/snap/bin"' >> ~/.zshrc或者bash:
echo 'export PATH="$PATH:/snap/bin"' >> ~/.bashrc有可能遇到这个报错:
error: cannot install "certbot": cannot query the store for updates: got unexpected HTTP status
    code 408 via POST to "https://api.snapcraft.io/v2/snaps/refresh"
解决:
ip addr查看网卡名称(),然后使用如下命令即可 sudo ip li set mtu 1400 dev <interface>
现在重新进一次终端,或者输入zsh再回车,bash也行,取决于你在用什么
2.3 安装certbot dns cf插件
sudo snap set certbot trust-plugin-with-root=ok
sudo snap install certbot-dns-cloudflare
2.4 安装htpasswd(可选)
sudo apt install apache2-utils2.5 生成密码(可选)
htpasswd -Bc /home/docker-registry/registry.passwords name2.6 将cloudflare的api放进配置文件中
vim /home/nginx/config/cloudflare.inidns_cloudflare_email = [email protected]
dns_cloudflare_api_key = xxxxxxxxxxxxxxxxxxxxxxxxxxxxxxxxxxxxx2.7 给cloudflare.ini设置权限
chmod 600 /home/nginx/config/cloudflare.ini3.解析域名xxx.com到当前主机ip
4.配置conf.d中的conf
4.1 创建并编辑conf.d中,对应域名的配置文件
vim /home/nginx/etc/nginx/conf.d/xxx.com.conf粘贴进来:
# websocket支持
map $http_upgrade $connection_upgrade {
    default upgrade;
    '' close;
}
server {
    listen 8880;
    listen [::]:8880;
    http2 on;
    server_name xxx.com;

    access_log /var/log/nginx/xxx.com_access.log geoip_enriched;
    error_log /var/log/nginx/xxx.com_error.log;

    return 301 https://$host:8443$request_uri;
}
server {
    listen 8443 ssl;
    listen [::]:8443 ssl;
    http2 on;
    server_name xxx.com;

    auth_request @geoip; # 如果发现网站不能上传文件,将此行注释掉,目前只发现两个网站不能用这个

    # 从auth_request返回的头信息中提取变量
    auth_request_set $geoip_country $upstream_http_x_geoip_country;
    auth_request_set $geoip_stateprov $upstream_http_x_geoip_stateprov;
    auth_request_set $geoip_city $upstream_http_x_geoip_city;
    auth_request_set $geoip_latitude $upstream_http_x_geoip_latitude;
    auth_request_set $geoip_longitude $upstream_http_x_geoip_longitude;
    auth_request_set $geoip_continent $upstream_http_x_geoip_continent;
    auth_request_set $geoip_timezone $upstream_http_x_geoip_timezone;
    auth_request_set $geoip_asn $upstream_http_x_geoip_asn;
    auth_request_set $geoip_asnorganization $upstream_http_x_geoip_asnorganization;

    # 将提取到的变量添加到头信息中
    add_header X-Geoip-Country $geoip_country always;
    add_header X-Geoip-StateProv $geoip_stateprov always;
    add_header X-Geoip-City $geoip_city always;
    add_header X-Geoip-Latitude $geoip_latitude always;
    add_header X-Geoip-Longitude $geoip_longitude always;
    add_header X-Geoip-Continent $geoip_continent always;
    add_header X-Geoip-Timezone $geoip_timezone always;
    add_header X-Geoip-Asn $geoip_asn always;
    add_header X-Geoip-AsnOrganization $geoip_asnorganization always;

    ssl_certificate /home/nginx/certs/xxx.com/fullchain.pem;
    ssl_certificate_key /home/nginx/certs/xxx.com/privkey.pem;

    # 启动HSTS
    add_header Strict-Transport-Security "max-age=63072000; includeSubDomains; preload" always;

    # 强制使用安全协议
    ssl_protocols TLSv1.2 TLSv1.3;
    ssl_prefer_server_ciphers on;
    ssl_ciphers 'ECDHE-ECDSA-AES256-GCM-SHA384:ECDHE-RSA-AES256-GCM-SHA384:ECDHE-ECDSA-CHACHA20-POLY1305:ECDHE-RSA-CHACHA20-POLY1305:ECDHE-ECDSA-AES128-GCM-SHA256:ECDHE-RSA-AES128-GCM-SHA256';
    ssl_session_cache shared:SSL:10m;
    ssl_session_timeout 10m;

    access_log /var/log/nginx/xxx.com_access.log geoip_enriched;
    error_log /var/log/nginx/xxx.com_error.log;

    location / {
        proxy_pass http://172.17.0.1:8008; #需要修改

        # 隐藏X-Powered-By
        proxy_hide_header X-Powered-By;

        # 显示真实ip
        proxy_set_header Host $host;
        proxy_set_header X-Real-IP $remote_addr;
        proxy_set_header X-Forwarded-For $proxy_add_x_forwarded_for;

        #cloudflare真实ip,如果使用了cf的cdn需要取消注释下面两行
        #set_real_ip_from 0.0.0.0/0;
        #real_ip_header CF-Connecting-IP;

        proxy_set_header X-Forwarded-Proto $scheme;
        proxy_read_timeout         900;

        # websocket支持
        proxy_set_header Upgrade $http_upgrade;
        proxy_set_header Connection $connection_upgrade;

        proxy_set_header Connection $http_connection;
        proxy_http_version 1.1;

        # 密码验证 (可选)
        # auth_basic "Registry Realm"; #(可选)
        # auth_basic_user_file /home/docker-registry/registry.passwords;# (可选)

    }
    location = @geoip {
      internal;

      proxy_pass http://172.17.0.1:8081/;
      # proxy_pass_request_body off;
      proxy_set_header X-Geoip-Address $remote_addr;
    }
}
其实这里的
密码验证不是一定要有,如果不想要密码验证的话也可以把auth_basic那两行注释掉其中
xxx.com批量替换成你的域名,ssl证书路径换一下即可,其他的可以不动可以考虑把这个文件保存为
/home/nginx/etc/nginx/conf.d/config.tamplate,以后添加网站,就直接复制一份这个文件来编辑即可
:wq保存退出
5.获取ssl证书
5.1 创建并编辑自定义脚本get_cert.sh
P.S. 其中的
[email protected]需要修改,不然运行的时候会报错Unable to register an account with ACME server. The ACME server believes [email protected] is an invalid email address. Please ensure it is a valid email and attempt registration again.
vim /home/nginx/config/get_cert.sh#!/bin/bash
# 传入的域名参数
DOMAIN=$1
# Certbot 配置文件路径
CLOUDFLARE_INI_PATH="/home/nginx/config/cloudflare.ini"
# 证书生成的路径前缀
CERT_BASE_DIR="/etc/letsencrypt"
# 目标路径
TARGET_DIR="/home/nginx/certs/$DOMAIN"
# 检查目标目录是否存在
if [ ! -d "$TARGET_DIR" ]; then
mkdir -p "$TARGET_DIR"
fi
# 函数:检查证书是否即将过期(30天内)
check_cert_expiry() {
if [ -f "$TARGET_DIR/fullchain.pem" ]; then
EXPIRY_DATE=$(openssl x509 -enddate -noout -in "$TARGET_DIR/fullchain.pem" | cut -d= -f2)
EXPIRY_TIMESTAMP=$(date -d "$EXPIRY_DATE" +%s)
CURRENT_TIMESTAMP=$(date +%s)
DAYS_LEFT=$(( ($EXPIRY_TIMESTAMP - $CURRENT_TIMESTAMP) / 86400 ))
if [ $DAYS_LEFT -gt 30 ]; then
echo "The certificate for $DOMAIN is still valid for $DAYS_LEFT days."
exit 0
fi
fi
}
# 检查证书是否存在并且是否即将过期
check_cert_expiry
# 申请新证书
sudo certbot certonly --dns-cloudflare --dns-cloudflare-credentials "$CLOUDFLARE_INI_PATH" -d "$DOMAIN" -n --agree-tos --logs-dir /home/nginx/config/log --email [email protected]
# 检查证书生成是否成功
if [ $? -ne 0 ]; then
echo "Certbot failed to obtain the certificate for $DOMAIN."
exit 1
fi
# 获取实际生成证书的目录
CERT_DIR=$(sudo ls -d ${CERT_BASE_DIR}/live/${DOMAIN}* | sort -V | tail -n 1)
# 复制文件,并在复制成功后执行删除操作
cp "$CERT_DIR/fullchain.pem" "$TARGET_DIR/" && \
cp "$CERT_DIR/privkey.pem" "$TARGET_DIR/" && \
cp "$CERT_DIR/chain.pem" "$TARGET_DIR/" && \
cp "$CERT_DIR/cert.pem" "$TARGET_DIR/" && \
# 如果复制成功了,则删除原始证书
rm -r $CERT_BASE_DIR/live/* && \
rm -r $CERT_BASE_DIR/archive/*
echo "Certificate for $DOMAIN has been successfully obtained and placed in $TARGET_DIR.":wq保存退出
5.2 创建并编辑自定义脚本renew.sh
vim /home/nginx/config/renew.sh#!/bin/bash
# 获取当前日期和时间
current_time=$(date +"%Y-%m-%d %H:%M:%S")
echo "" >> /home/nginx/config/log/renew.log
echo "start renew at: $current_time" >> /home/nginx/config/log/renew.log
# 获取 /home/nginx/certs 目录下的所有子目录名称
certs_dirs=$(find /home/nginx/certs -maxdepth 1 -mindepth 1 -type d -exec basename {} \;)
# 循环遍历每个子目录并执行指定的 zsh 命令
for dir in $certs_dirs; do
zsh /home/nginx/config/get_cert.sh "$dir" >> /home/nginx/config/log/renew.log
done
echo "renew complete at: $current_time" >> /home/nginx/config/log/renew.log5.3 给予以上俩个脚本可执行权限
chmod +x /home/nginx/config/*.sh5.4 获取ssl证书
zsh /home/nginx/config/get_cert.sh xxx.com或者你用bash的话就把zsh改成bash
返回类似如下内容即申请成功:
$ zsh /home/nginx/config/get_cert.sh xxx.com
Saving debug log to /home/nginx/config/log/letsencrypt.log
Account registered.
Requesting a certificate for xxx.com
Unsafe permissions on credentials configuration file: /home/nginx/config/cloudflare.ini
Waiting 10 seconds for DNS changes to propagate

Successfully received certificate.
Certificate is saved at: /etc/letsencrypt/live/xxx.com/fullchain.pem
Key is saved at:         /etc/letsencrypt/live/xxx.com/privkey.pem
This certificate expires on 2024-09-07.
These files will be updated when the certificate renews.
Certbot has set up a scheduled task to automatically renew this certificate in the background.

- - - - - - - - - - - - - - - - - - - - - - - - - - - - - - - - - - - - - - - -
If you like Certbot, please consider supporting our work by:
 * Donating to ISRG / Let's Encrypt:   https://letsencrypt.org/donate
 * Donating to EFF:                    https://eff.org/donate-le
- - - - - - - - - - - - - - - - - - - - - - - - - - - - - - - - - - - - - - - -
Certificate for xxx.com has been successfully obtained and placed in /home/nginx/certs/xxx.com.
现在你看目录就能看见证书:
ls -la /home/nginx/certs/*/$ ls -la /home/nginx/certs/*/
total 24
drwxr-xr-x 2 root root 4096 Jun 10 00:29 .
drwxr-xr-x 3 root root 4096 Jun 10 00:27 ..
-rw-r--r-- 1 root root 1302 Jun 10 00:29 cert.pem
-rw-r--r-- 1 root root 1566 Jun 10 00:29 chain.pem
-rw-r--r-- 1 root root 2868 Jun 10 00:29 fullchain.pem
-rw------- 1 root root 241 Jun 10 00:29 privkey.pem5.5 ssl证书自动更新
crontab -e将下面的两行加到文件最后:
# 自动刷新nginx的ssl证书
20 */8 * * * bash /home/nginx/config/renew.sh
5.6 启动nginx容器
docker-compose -f /home/nginx/docker-compose.yml up -d5.7 测试nginx配置文件
docker exec -it nginx nginx -t$ docker exec -it nginx nginx -t
nginx: the configuration file /etc/nginx/nginx.conf syntax is ok
nginx: configuration file /etc/nginx/nginx.conf test is successful5.8 上一步测试成功后重载nginx
docker exec -it nginx nginx -s reload执行后不会有任何返回
5.8 打开网页测试
浏览器打开
https://xxx.com:8443会看到需要输入用户名和密码,也即是3.5 生成密码中设置的用户名和密码(可选)
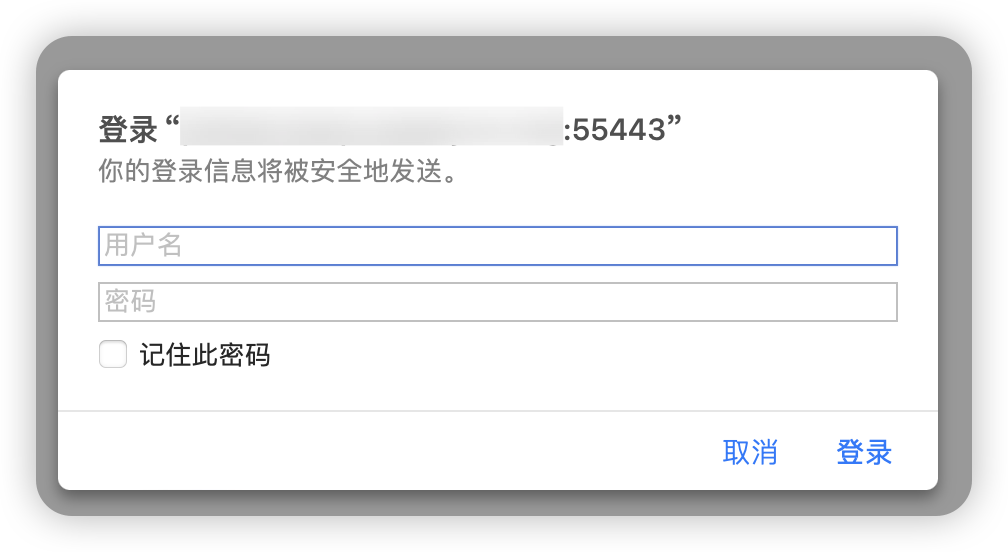
可见已成功上锁:

这样就可实现用未备案域名解析到国内的主机上,然后通过非标端口反向代理并使用ssl而不会被厂商阻断重定向
6.打开logrotate,防止日志过大
系统一般自带的,如果没有自带就手动安装一下
sudo apt-get install logrotate6.1 创建并编辑/etc/logrotate.d/nginx配置文件
vim /etc/logrotate.d/nginx/home/nginx/var/log/nginx/*.log /home/nginx/config/log/*.log {
weekly
missingok
rotate 180
compress
delaycompress
notifempty
create 0640 www-data adm
sharedscripts
postrotate
docker exec nginx nginx -s reopen
endscript
}说明:
weekly:7天轮换一次。
missingok:如果日志文件不存在,继续进行轮换。
rotate 180:保留180天的日志文件,超过的日志文件将被删除。
compress:压缩轮换后的日志文件。
delaycompress:延迟一天压缩日志文件,以便查看最新的日志内容。
notifempty:如果日志文件为空,则不进行轮换。
create 0640 www-data adm:创建新的日志文件,设置权限为0640,所有者为 www-data:adm。
(如果是root root的话,这里可以改成
create 0644 root root)sharedscripts:共享脚本模式,确保在所有日志文件轮换完成后只执行一次 postrotate 中的脚本。
postrotate:在日志轮换后执行的脚本部分,这里使用 docker exec 命令向 Nginx 容器发送信号重新打开日志文件。
endscript:脚本结束标志。
6.2 检查 logrotate 配置文件的语法和有效性
sudo logrotate -d /etc/logrotate.d/nginx执行后会返回:
# root @ Ubuntu in /home/nginx/var/log/nginx [22:41:02]
$ sudo logrotate -d /etc/logrotate.d/nginx
WARNING: logrotate in debug mode does nothing except printing debug messages!  Consider using verbose mode (-v) instead if this is not what you want.

reading config file /etc/logrotate.d/nginx
Reading state from file: /var/lib/logrotate/status
Allocating hash table for state file, size 64 entries
Creating new state
Creating new state
Creating new state
Creating new state
Creating new state
Creating new state
Creating new state
Creating new state
Creating new state
Creating new state
Creating new state
Creating new state
Creating new state
Creating new state
Creating new state
Creating new state
Creating new state
Creating new state
Creating new state
Creating new state
Creating new state
Creating new state
Creating new state
Creating new state
Creating new state
Creating new state
Creating new state

Handling 1 logs

rotating pattern: /home/nginx/var/log/nginx/*.log  after 1 days (180 rotations)
empty log files are not rotated, old logs are removed
considering log /home/nginx/var/log/nginx/access.log
Creating new state
  Now: 2024-06-29 22:42
  Last rotated at 2024-06-29 22:00
  log does not need rotating (log has been already rotated)
considering log /home/nginx/xxx.com_access.log
Creating new state
  Now: 2024-06-29 22:42
  Last rotated at 2024-06-29 22:00
  log does not need rotating (log has been already rotated)
considering log /home/nginx/xxx.com_error.log
Creating new state
  Now: 2024-06-29 22:42
  Last rotated at 2024-06-29 22:00
  log does not need rotating (log has been already rotated)
considering log /home/nginx/var/log/nginx/error.log
Creating new state
  Now: 2024-06-29 22:42
  Last rotated at 2024-06-29 22:00
  log does not need rotating (log has been already rotated)
not running postrotate script, since no logs were rotated

# root @ Ubuntu in /home/nginx/var/log/nginx [22:42:25]
没有报错即可
6.3 手动触发一次日志轮换以确保一切运行正常
sudo logrotate -f /etc/logrotate.d/nginx执行后发现旧日志后面多了个.1就是正常运行
# root @ Ubuntu in /home/nginx/var/log/nginx [22:45:39]
$ sudo logrotate -f /etc/logrotate.d/nginx

# root @ Ubuntu in /home/nginx/var/log/nginx [22:45:41]
$ ll
total 556K
-rw-r--r-- 1 systemd-resolve root    0 Jun 29 21:45 access.log
-rw-r----- 1 systemd-resolve adm     0 Jun 29 22:45 xxx-1.com_access.log
-rw-r--r-- 1 root            root 265K Jun 29 22:45 xxx-1.com_access.log.1
-rw-r--r-- 1 systemd-resolve root    0 Jun 29 21:56 xxx-1.com_error.log
-rw-r----- 1 systemd-resolve adm     0 Jun 29 22:45 xxx-2.com_access.log
-rw-r--r-- 1 root            root 6.6K Jun 29 22:34 xxx-2.com_access.log.1
-rw-r--r-- 1 systemd-resolve root    0 Jun 29 22:22 xxx-2.com_error.log
-rw-r----- 1 systemd-resolve adm     0 Jun 29 22:45 xxx-3.com_access.log
-rw-r--r-- 1 root            root 259K Jun 29 22:31 xxx-3.com_access.log.1
-rw-r--r-- 1 systemd-resolve root    0 Jun 29 22:26 xxx-3.com_error.log
-rw-r----- 1 systemd-resolve adm    61 Jun 29 22:45 error.log
-rw-r--r-- 1 root            root  11K Jun 29 22:45 error.log.1
从此以后,这个路径下的日志便会定期自动轮换
7.防止ip:80或者 ip:443访问
如果是上文的8880和8443就对应替换一下
为什么要禁止?
因为我发现通过http://ip:80或者https://ip:443会随机访问到config.d中配置过的网站的错误界面
7.1 创建并编辑default.conf
vim /home/nginx/etc/nginx/conf.d/default.conf粘贴进去
server {
    listen 80 default_server;
    listen [::]:80 default_server;

    server_name _;

    location / {
        return 444;
    }
}

server {
    listen 443 ssl default_server;
    listen [::]:443 ssl default_server;

    server_name _;

    ssl_certificate /home/nginx/config/do.not.even.try/cert.pem;
    ssl_certificate_key /home/nginx/config/do.not.even.try/key.pem;

    return 444;
}:wq保存退出
7.2 生成自签名ssl证书
openssl req -x509 -nodes -newkey rsa:4096 -keyout /home/nginx/config/do.not.even.try/key.pem -out /home/nginx/config/do.not.even.try/cert.pem -days 36500 -subj "/CN=do.not.even.try"说明:生成一个域名为do.not.even.try,有效期为100年的自签名证书7.3 测试并应用配置文件
测试:
docker exec -it nginx nginx -t$ docker exec -it nginx nginx -t
nginx: the configuration file /etc/nginx/nginx.conf syntax is ok
nginx: configuration file /etc/nginx/nginx.conf test is successful应用:
docker exec -it nginx nginx -s reload现在就只能通过域名来访问了
